SELECT YOUR LANGUAGE
Fold down second row seats. Please see Owner's Handbook if unsure how to do this.
Remove parts in this order.
Remove loadspace scuff plate trim panel.
Remove left C-pillar and D-pillar upper trims.
Partially remove both left and right side trim panel by removing 4 clips on each side for access.
Disconnect 12V start up battery and remove battery bracket.
Raise vehicle on post ramp.
Remove rear bumper.
Drop rear exhaust sufficiently enough to gain access to area between rear silencer and rear floor for installation of fixings (E1) in install step 1.
Remove one or two exhaust heatshields depending on vehicle specification with (x3) fixings for each heatshield.
Remove rear armature.
Install towbar brackets (E) and (F) to vehicle with fixings (E1).
Install towbar (G) to vehicle with fixings (G1).
Tighten towbar fixings in this order as illustrated.
Tighten towbar bracket fixings in this order as illustrated on both sides of the vehicle.
Install one or two exhaust heatshields depending on vehicle specification with (x3) fixings for each heatshield.
Install rear exhaust system covered in steps 10, 11 or 12.
Lower vehicle on post ramp.
Remove grommet from spare wheel well.
Pull back left side trim panel and install module holder (A) to body with fixings (A1).
Install Tow Bar Control Module (TBM) (B) to module holder.
Remove existing deployable side step link cable (X). Disconnect (x2) connectors, earth cable and (x3) cable ties.
Continue to remove existing deployable side step link cable (X). Disconnect (x4) cable ties. The remaining part of link lead (X) is connected to the back of the junction box which can be removed in steps 21 and 22.
Remove (x3) body harness clips from spare wheel well in preparation of installing the towing harness (C).
Familiarize yourself with towing harness (C).
Feed towing harness (C) through spare wheel well.
Reinstall (x1) body harness clip to spare wheel well stud.
Install towing harness (C).
Reinstall (x2) body harness clips to spare wheel well studs.
Pull back left side trim panel and install towing harness as illustrated.
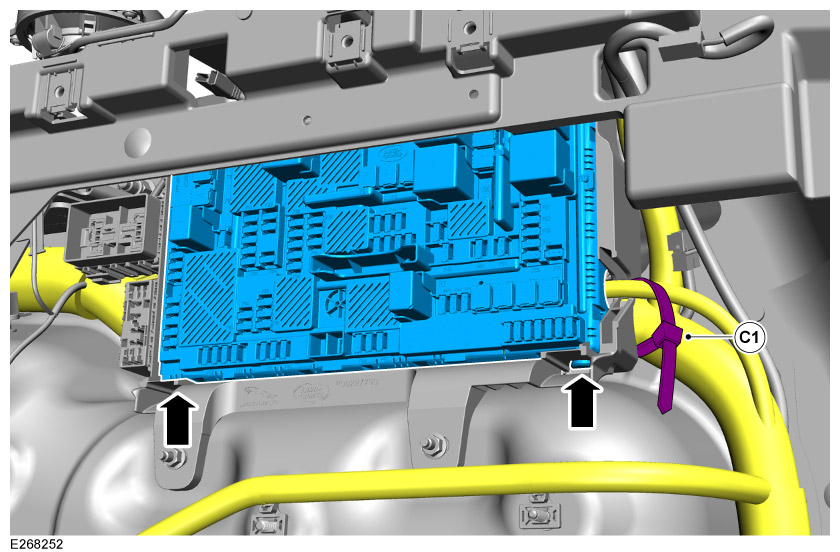
Cut cable tie and release junction box from bottom clips.
Install towing harness to back of junction box.
Reconnect junction box by the lower clips (a clicking sound will alert you it is securely in place), and then cable tie (C1).
Pull back right side trim panel and install towing harness (C).
Connect fuses.
Install towbar harness to towbar.
Reconnect battery (reversal of removal step 7).
Begin diagnostic procedure in parallel to the following trim installation steps.
Install the obstacle detection control module assembly on both sides of the vehicle.
Install rear bumper support bracket (x7) fixings.
Install the antenna module and harness.
Reinstall rear bumper with new towbar valance (H) and secure with (x3) clips (H1).
Install all trims (reversal of removal steps 6 to 2).
Fold up second row seats.
To install the detachable ball please refer to the Owner's Handbook.
Install tow ball.
When not using the detachable ball (I) and dirt cover (D) you can store in the tool foam tray under the loadspace cover.
Use the bag in the kit to store the detachable ball (I). Then tie the bag to one of the D-loops in the loadspace as illustrated.
Check for Diagnostic Trouble Code(s) (DTC) on Pathfinder.
Check the operation of the trailer lamps and the vehicle lamps. Both trailer and vehicle lights must be synchronised.