SELECT YOUR LANGUAGE
Open the tailgate.
Remove the parcel shelf from the vehicle.
Remove the loadspace floor trim.
Remove the spare wheel.
Remove the loadspace insert.
Remove the loadspace side trim as illustrated.For additional information, please refer to the official Workshop Manual. Loadspace Trim Panel LH/RH (501-05)
Disconnect the battery ground cable.For additional information, please refer to the official Workshop Manual. Battery Disconnect and Connect (414-01)
Remove the lid from the battery junction box.
Install the battery charger wiring harness to the battery.
Use cable ties to secure the battery charger wiring harness to the main wiring harness as illustrated.
Connect the eyelet at the end of the battery charger ground cable, colored black, to the vehicle battery ground terminal. Cable tie the battery charger cables to the battery ground cable as illustrated.
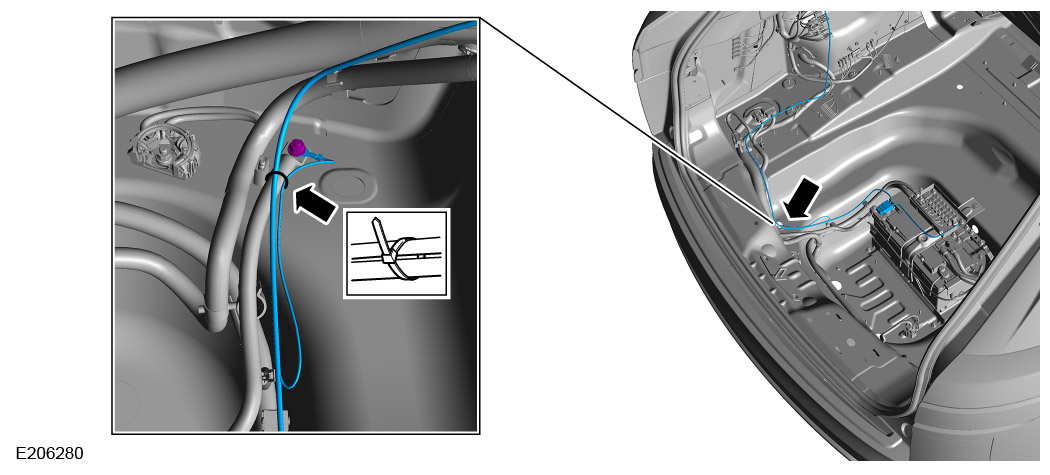
Cable tie the battery charger wiring harness along the main wiring harness as illustrated.
Cable tie the battery charger wiring harness to the main wiring harness. Make sure the battery charger wiring harness crosses over the top of the towbar module connectors if the towbar module is installed.
Route the battery charger wiring harness vertically as illustrated. Cable tie the battery charger wiring harness to the main wiring harness.
Using a suitable cutting tool, cut a 13 mm hole in the loadspace side trim as illustrated.
Install the battery charger socket to the loadspace side trim.
Connect the battery charger electrical connector to the battery charger socket.
Install the loadspace side trim as illustrated.For additional information, please refer to the official Workshop Manual. Loadspace Trim Panel LH/RH (501-05)
Install the spare wheel.
Install the loadspace insert.
Install the loadspace floor trim in the illustrated sequence.
Replace the parcel shelf into the vehicle if required.
Close the tailgate.