LAND ROVER ACCESSORY FITTING INSTRUCTIONS

VEHICLE :
PART NO :
KEYWORD :

LAND ROVER

DEFENDER

LOADSPACE - RUBBER MAT - 90 / 110

VPLES0565 / VPLES0566 / VPLLE0066 / VPLLE0067

FITTING INSTRUCTION

WARNING
  • Accessories which are not correctly installed can be dangerous. Read the instructions carefully prior to ordering and installation to make sure this accessory is applicable to your variant of vehicle. Comply with instructions at all times. If in doubt, contact your nearest approved retailer.
Accessory Kits Required Part Number Superseded By
Loadspace Rubber Mat - Defender 90 VPLES0565 VPLLE0066
Loadspace Rubber Mat - Defender 110 VPLES0566 VPLLE0067

Loadspace Rubber Mat - Defender 90 (Bill of Materials)

Loadspace Rubber Mat - Defender 110 (Bill of Materials)

Warnings / Cautions / Notes

WARNING
  • Make sure that protective gloves are worn if cutting parts.
CAUTION
  • Take care not to close the tailgate when the bumper protector is installed.
NOTE
  • If the loadspace rubber mat is being installed in conjunction with the loadspace partition. Then the loadspace rubber mat must be installed first and then install the loadspace partition afterwards.
  • The loadspace rubber mat can be used if either the fixed D-loop anchor points or the sliding D-loop anchor points are installed.
  • This procedure contains some variation in the illustrations depending on the vehicle specification, but the essential information is always correct.
Fitting Instruction
1

Open the tailgate and remove the loadspace parcel tray from the vehicle. Then if present fold down the 3rd row seats.

2
NOTE
  • Defender 110 'ONLY'.

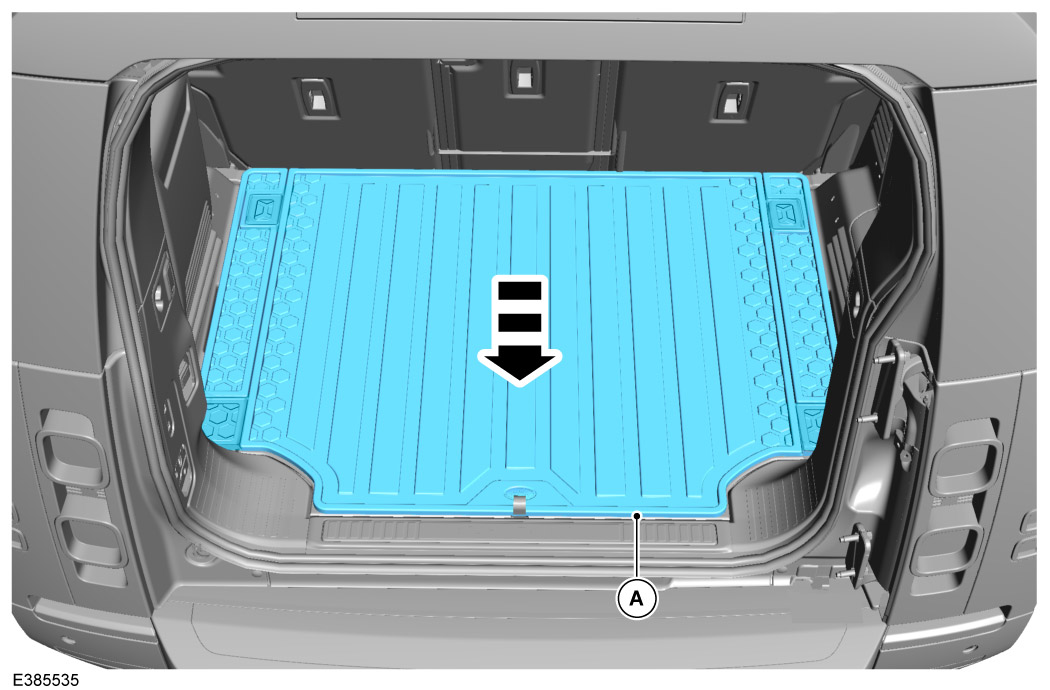
If you have sliding D-loop anchor points installed to your vehicle and are not in use then these must be removed before installing the rubber loadspace mat (A). If these are required cut the rubber loadspace mat shown in step 5.

  1. Unlock the D-loop anchor points.
  2. Push down on the locking switch to release.
  3. Move the D-loop anchor points up or down to the gaps on the rail where they can be removed.
3
NOTE
  • Defender 110 shown. Defender 90 is similar.
  • If access to D-Loops are required follow steps 4 or 5 depending on vehicle variant.

If you are not going to be using the vehicle D-Loop anchor points in the loadspace then the rubber loadspace mat (A) can simply be laid on top of the existing loadspace floor. Then jump to step 8 to install the rear bumper protector (B) if required.

4
WARNING
  • Make sure that protective gloves are worn if cutting.
NOTE
  • Defender 90 'ONLY'.

If access to the fixed D-loop anchor points are required then cutout from the loadspace rubber mat (A) as illustrated.

5
WARNING
  • Make sure that protective gloves are worn if cutting.
NOTE
  • Defender 110 'ONLY'.

If access to the fixed or sliding D-loop anchor points are required or if a loadspace partition is also being installed. Then cutout from the loadspace rubber mat (A) as illustrated.

  1. Fixed D-Loops.
  2. Sliding D-Loops. Do not discard the 2 sections trimmed from the loadspace rubber mat in. These can be used to protect the loadspace rails in the future if required.
  3. Loadspace Partition with D-Loops. Cut as illustrated. Only cut the x2 lower D-loop access points if required or the whole strip as shown in (2) if sliding D-loop are present and require movement.
6

Install the loadspace rubber mat (A) into the vehicle loadspace and make sure the loadspace rubber mat does not obstruct the 4 fixed or sliding D-loop anchor points if they are required.

7

Install the loadspace partition at this point if one is being installed in conjunction.

  1. Make sure the loadspace rubber mat does not obstruct the brackets for the loadspace partition.
  2. Make sure the loadspace rubber mat does not obstruct the D-loop anchor points if access required.
8
CAUTION
  • Take care not to close the tailgate when the bumper protector is installed.
NOTE
  • When not in use store the bumper protector inside the loadspace.

Install the rear bumper protector if required.

  1. Position the rear bumper protector (B) as illustrated.
  2. Using the 4 press studs, engage the loadspace rubber mat (A) to the bumper protector.
9

Install the parcel tray back to the vehicle if required. And make sure to remove the rear bumper protector (B) after use before closing the tailgate.

© Land Rover 2016